Structure of the code editor
Code editor
Our code editor contains multiple panel and part to create a full environment for your API automation and integration development.
Here is an example of main sections:
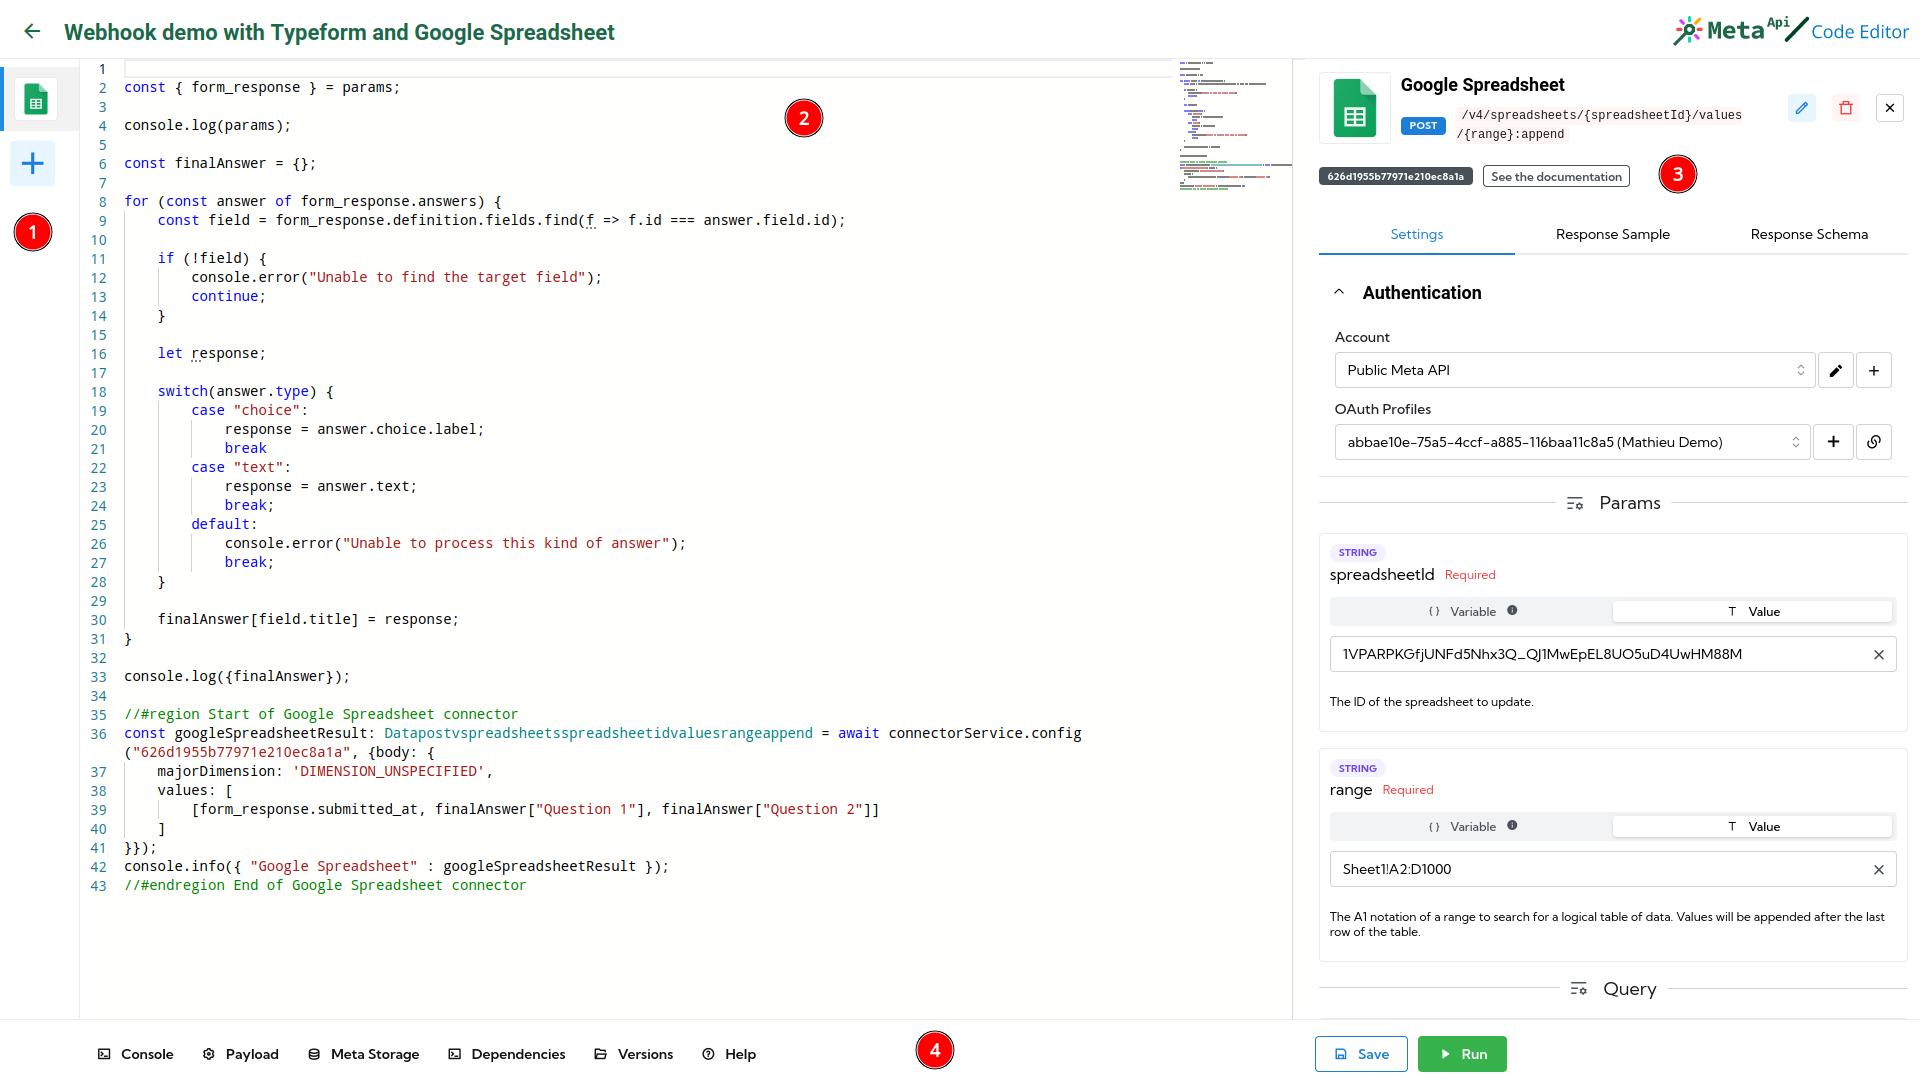
- Connector's panel: You'll have the list of all connectors configured inside your Spell. You can add new connectors from this panel. Connectors are automatically sorted in the same order that the code snippets used inside your code.
- Main code editor: you can write your JavaScript and TypeScript code here. We're using the same engine as VSCode to provide you the best experience to write code inside your browser. You'll have autocompletion, syntax coloration, auto formatting and more.
- Detail panel: the right panel is used to display the console, details about a connector, hints and advices to help you with the creation of your Spell, etc...
- Toolbar: you'll find all the buttons to interact with your Spell editor: open the console, manage your Payload, open your Meta Storage database, manage dependencies and publish a new version. You have also buttons to save and run your Spell to test it.
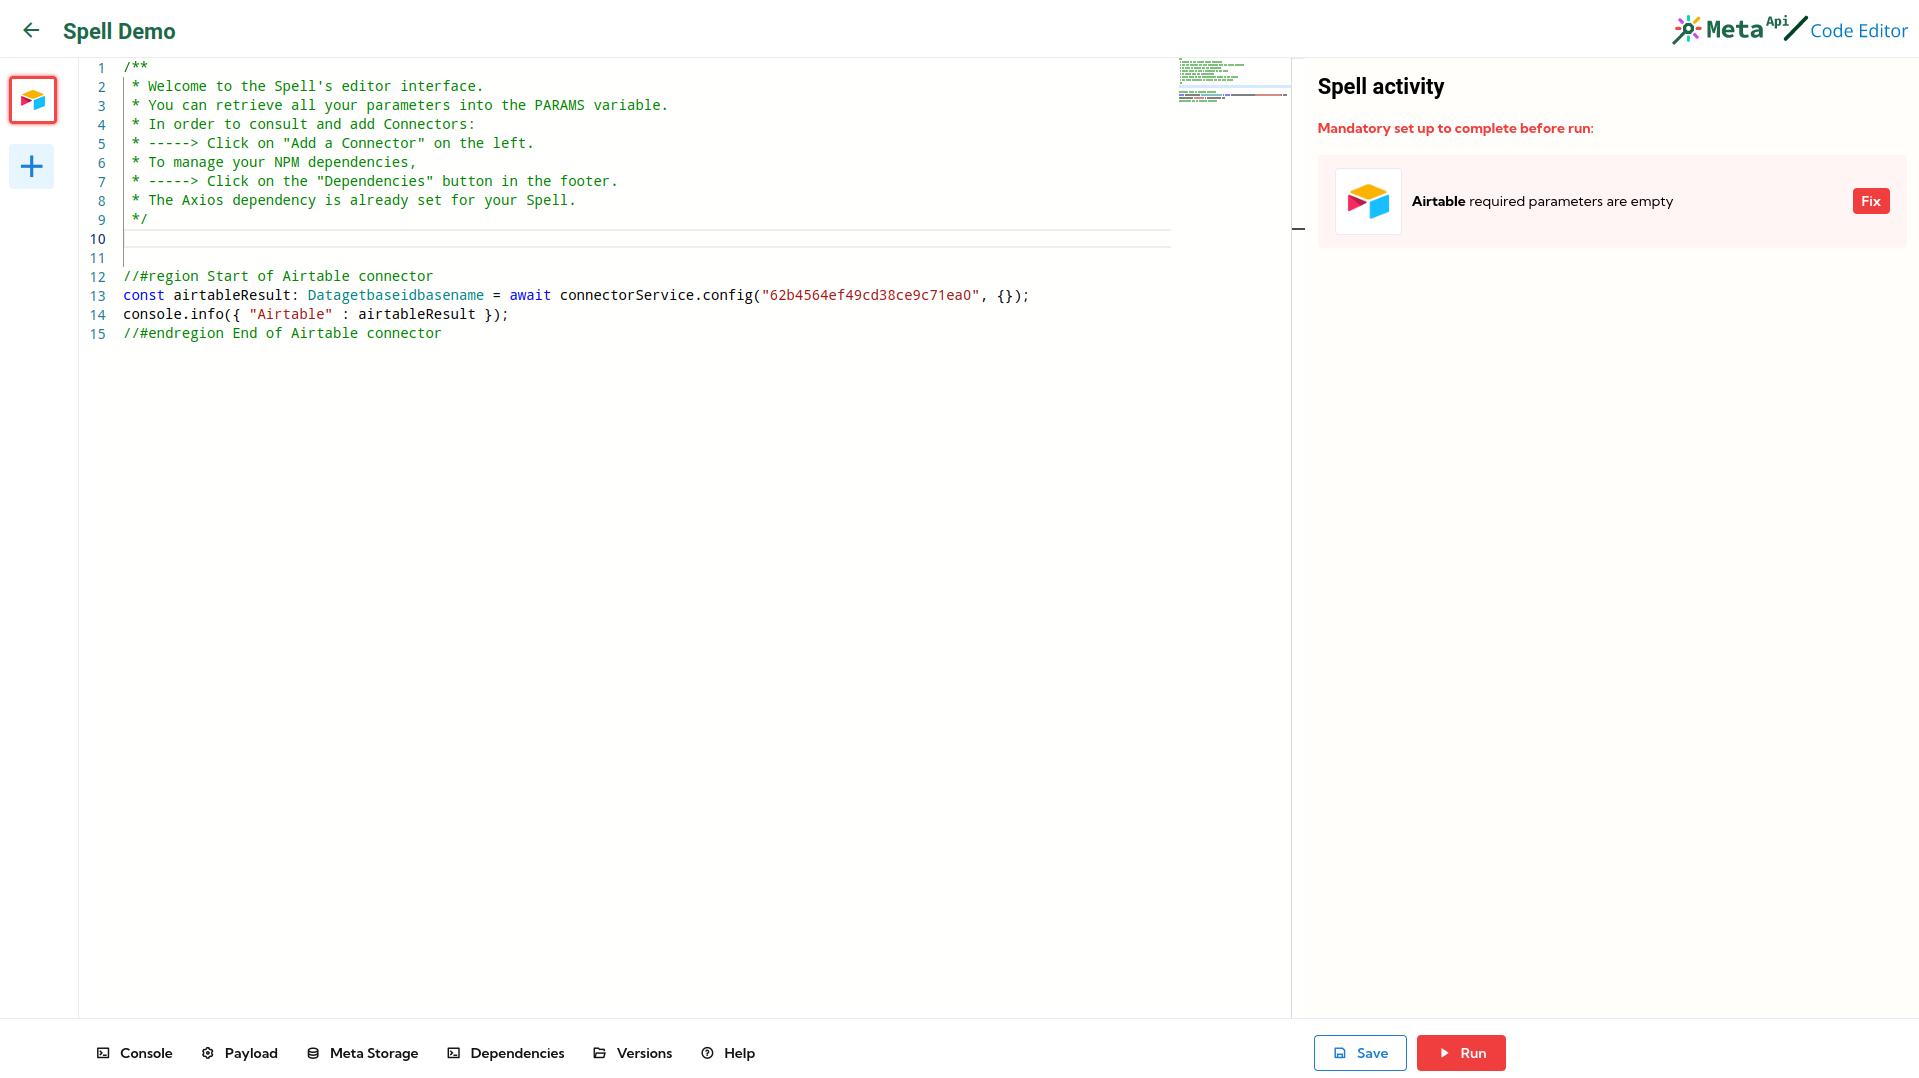
Activity panel
If nothing is selected, you'll see an activity panel on the right part of your Spell.
This panel will show you notifications about missing parameters, unused connectors and others tips to help you build your Spell.
Here is an example of the activity panel showing a notification about missing required parameters:
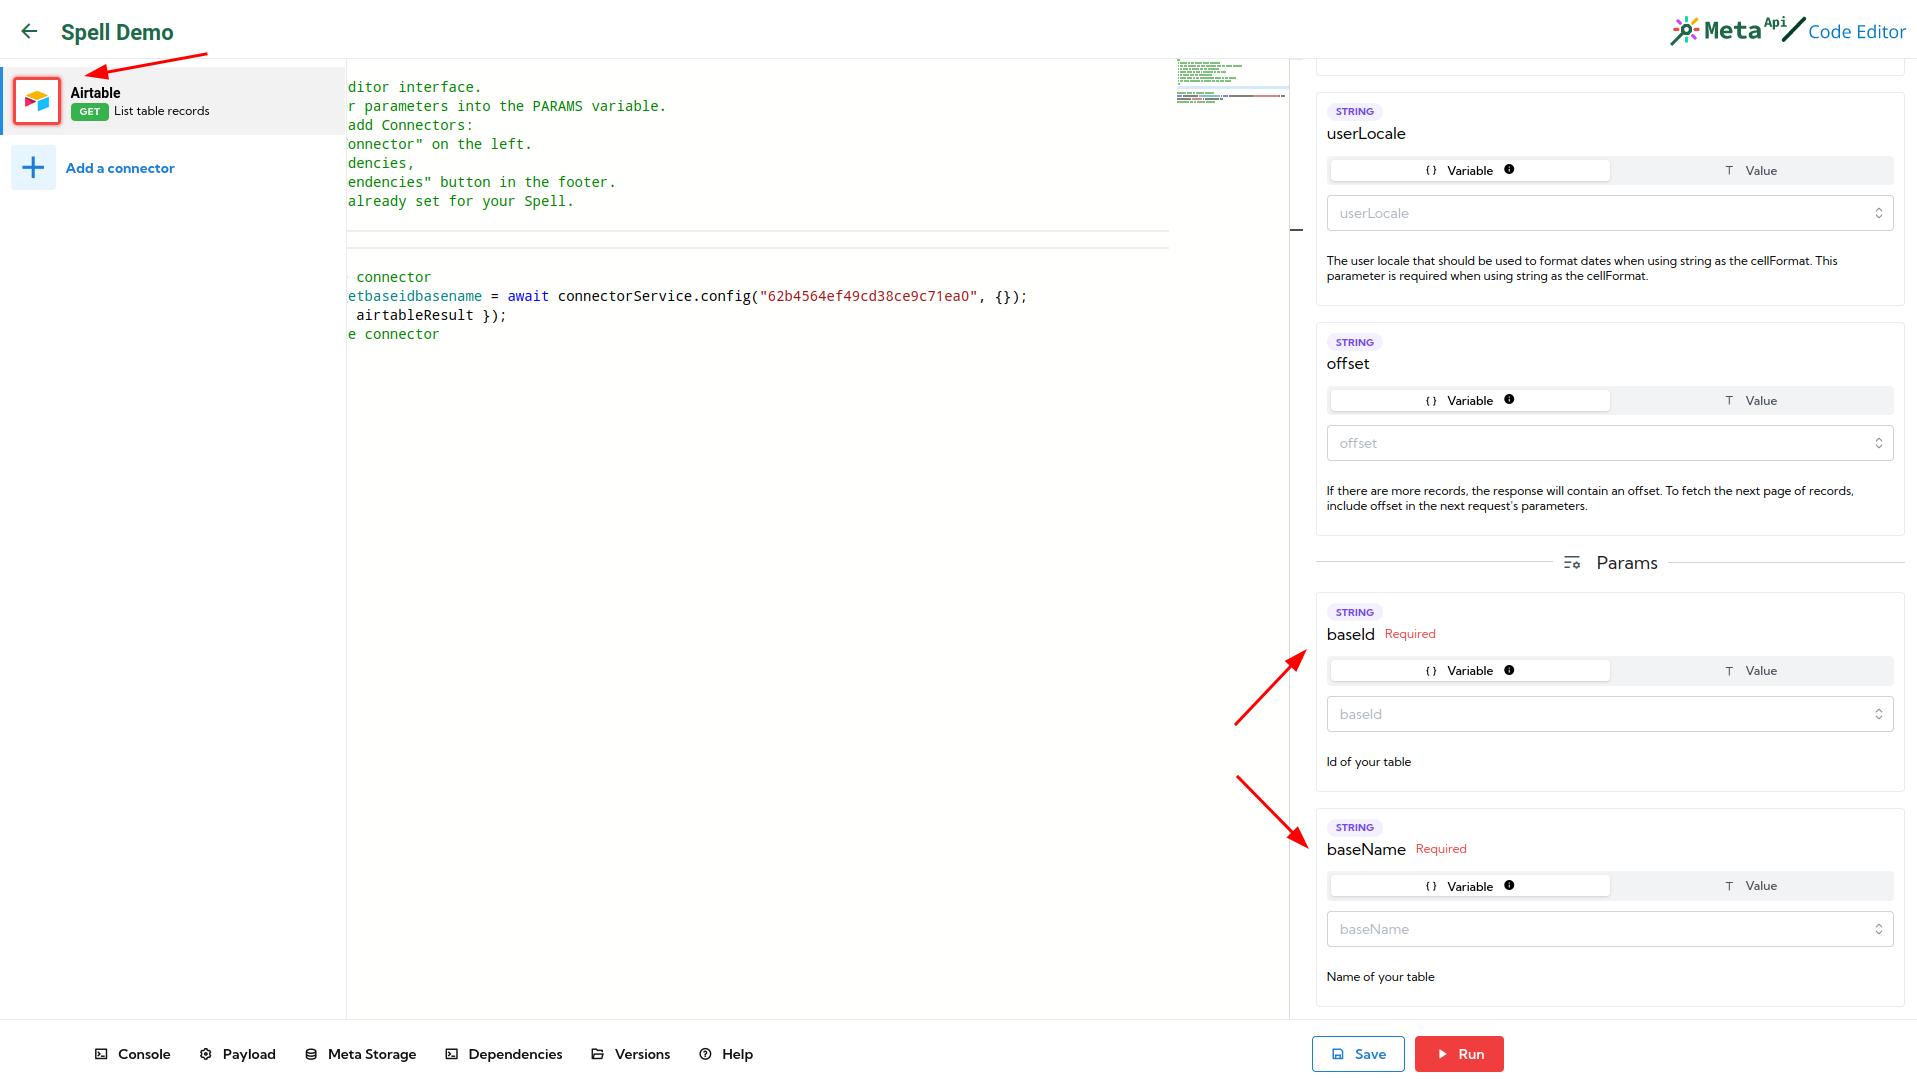
Connector's panel
On the left, you have the connector's panel.
You can select and add new connectors from this panel. The panel auto extends when you hover it, showing some details on each connector, like the name of the API and the endpoint associated.
You can select and unselect a connector by clicking on it.
If the connector is missing from your code, you'll see a yellow indicator around the connector. Having an unused connector inside your Spell doesn't affect your Spell performances. At run, this connector will be ignored.
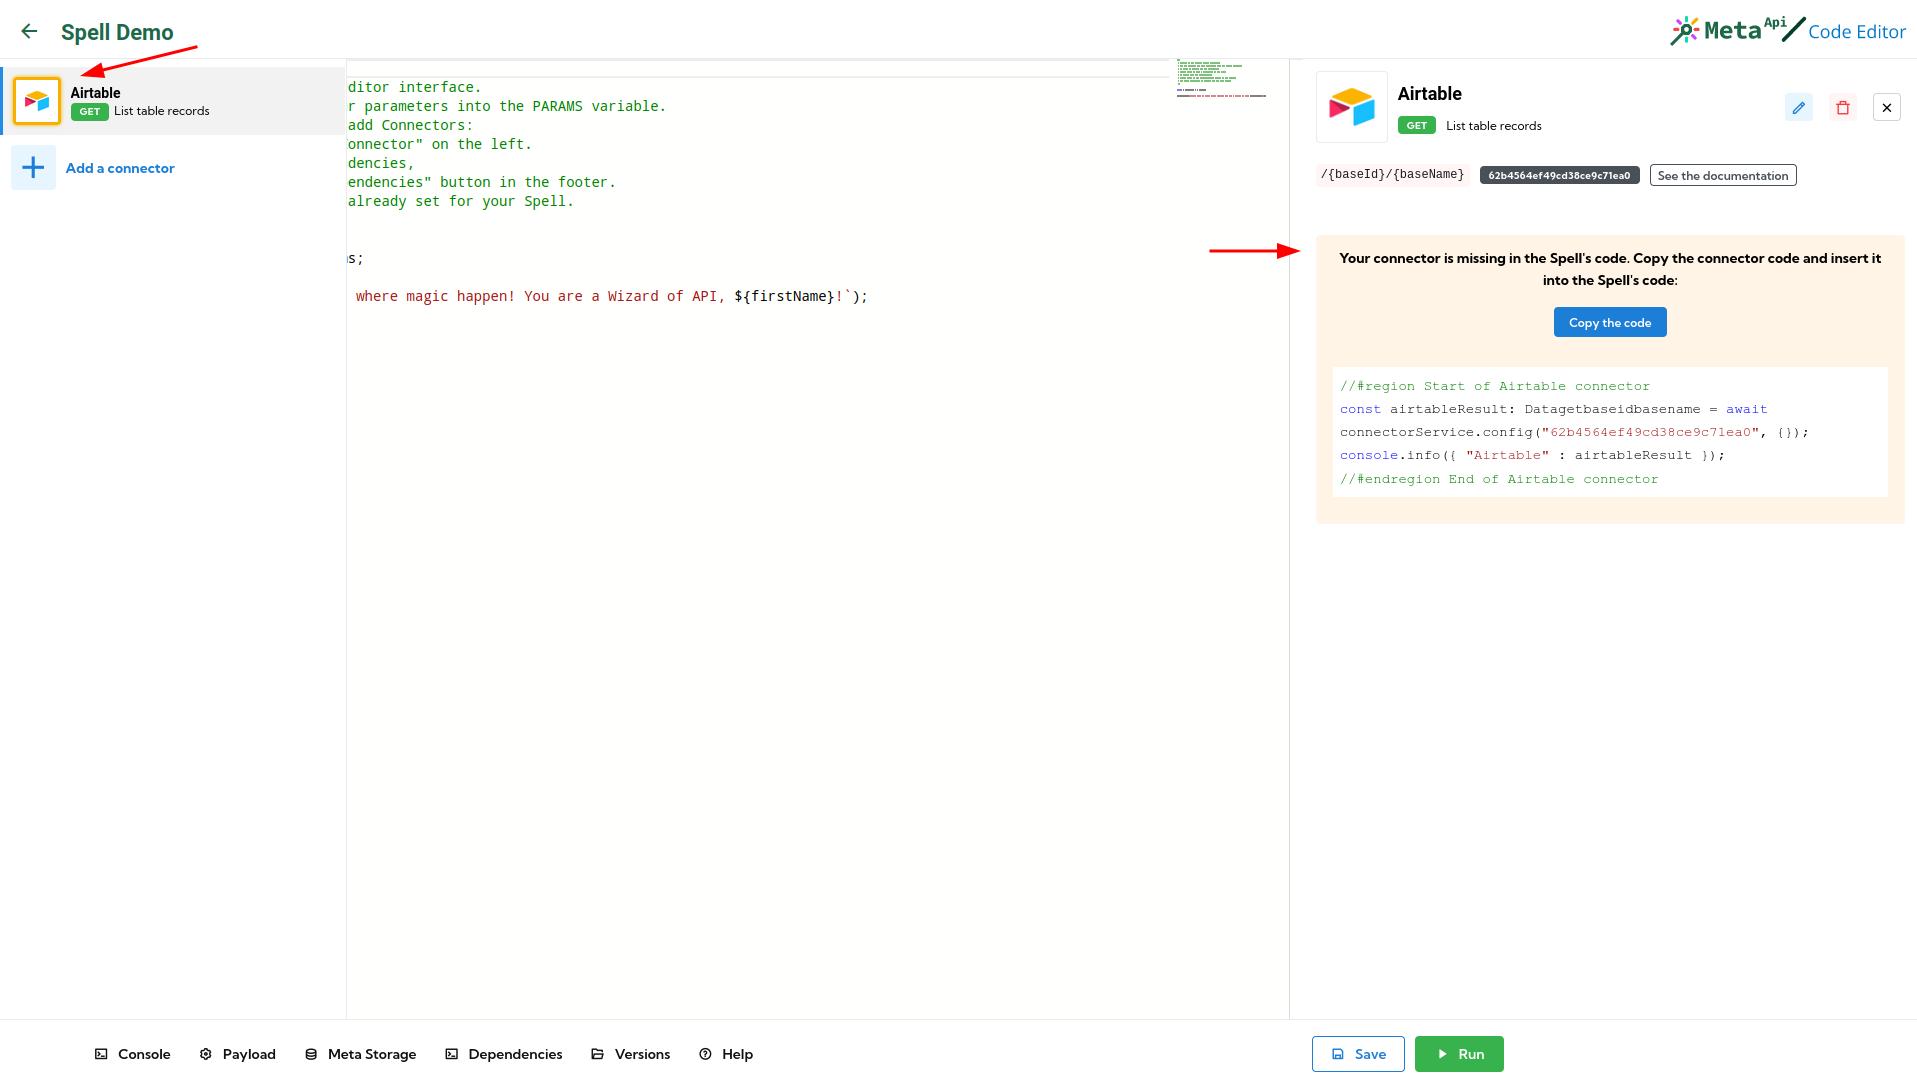
If a required parameter or authentication is missing on one of the connectors, you'll see a red indicator around it.
Toolbar actions
At the bottom of your code editor, you'll see all additional tools available inside your Spell.
Some explanation about these buttons:
- Console: the Console is automatically opened when your run a Spell. The console will show you both logs and the response of your Spell. If you open the Console manually, we'll retrieve for you the last logs and response.
- Payload: the Payload is a JSON Object send to your Spell when you run it during your development. You can access the content of this Payload inside your Spell using the
paramsvariable (more explanation here). You can set the Payload for your tests by clicking this button. - Meta Storage: it's our integrated key/value database, available directly inside your Spell. Clicking on it will show you the content of your Meta Storage database and help you to use it inside your Spell.
- Dependencies: sometimes, you need to use existing libraries to speed up your development or to connect to external services not available through APIs. You can manage NodeJS dependencies from here: we are connected to NPM to easily add libraries to your Spell.
- Versions: once your Spell is done, you can create a new version of it in order to deploy it on production. More explanation about versioning and deploying your Spell are available here.
In addition of these buttons, you have two more buttons available on the right side:
- Save: this button will save the code you've written to your account. You can now re-open your Spell on any computer or web browser.
- Run: send a new test request using this button. The Console panel will be open automatically, showing you the response and the logs. More info on this here.