Add and configure connectors
Configure connector's parameters
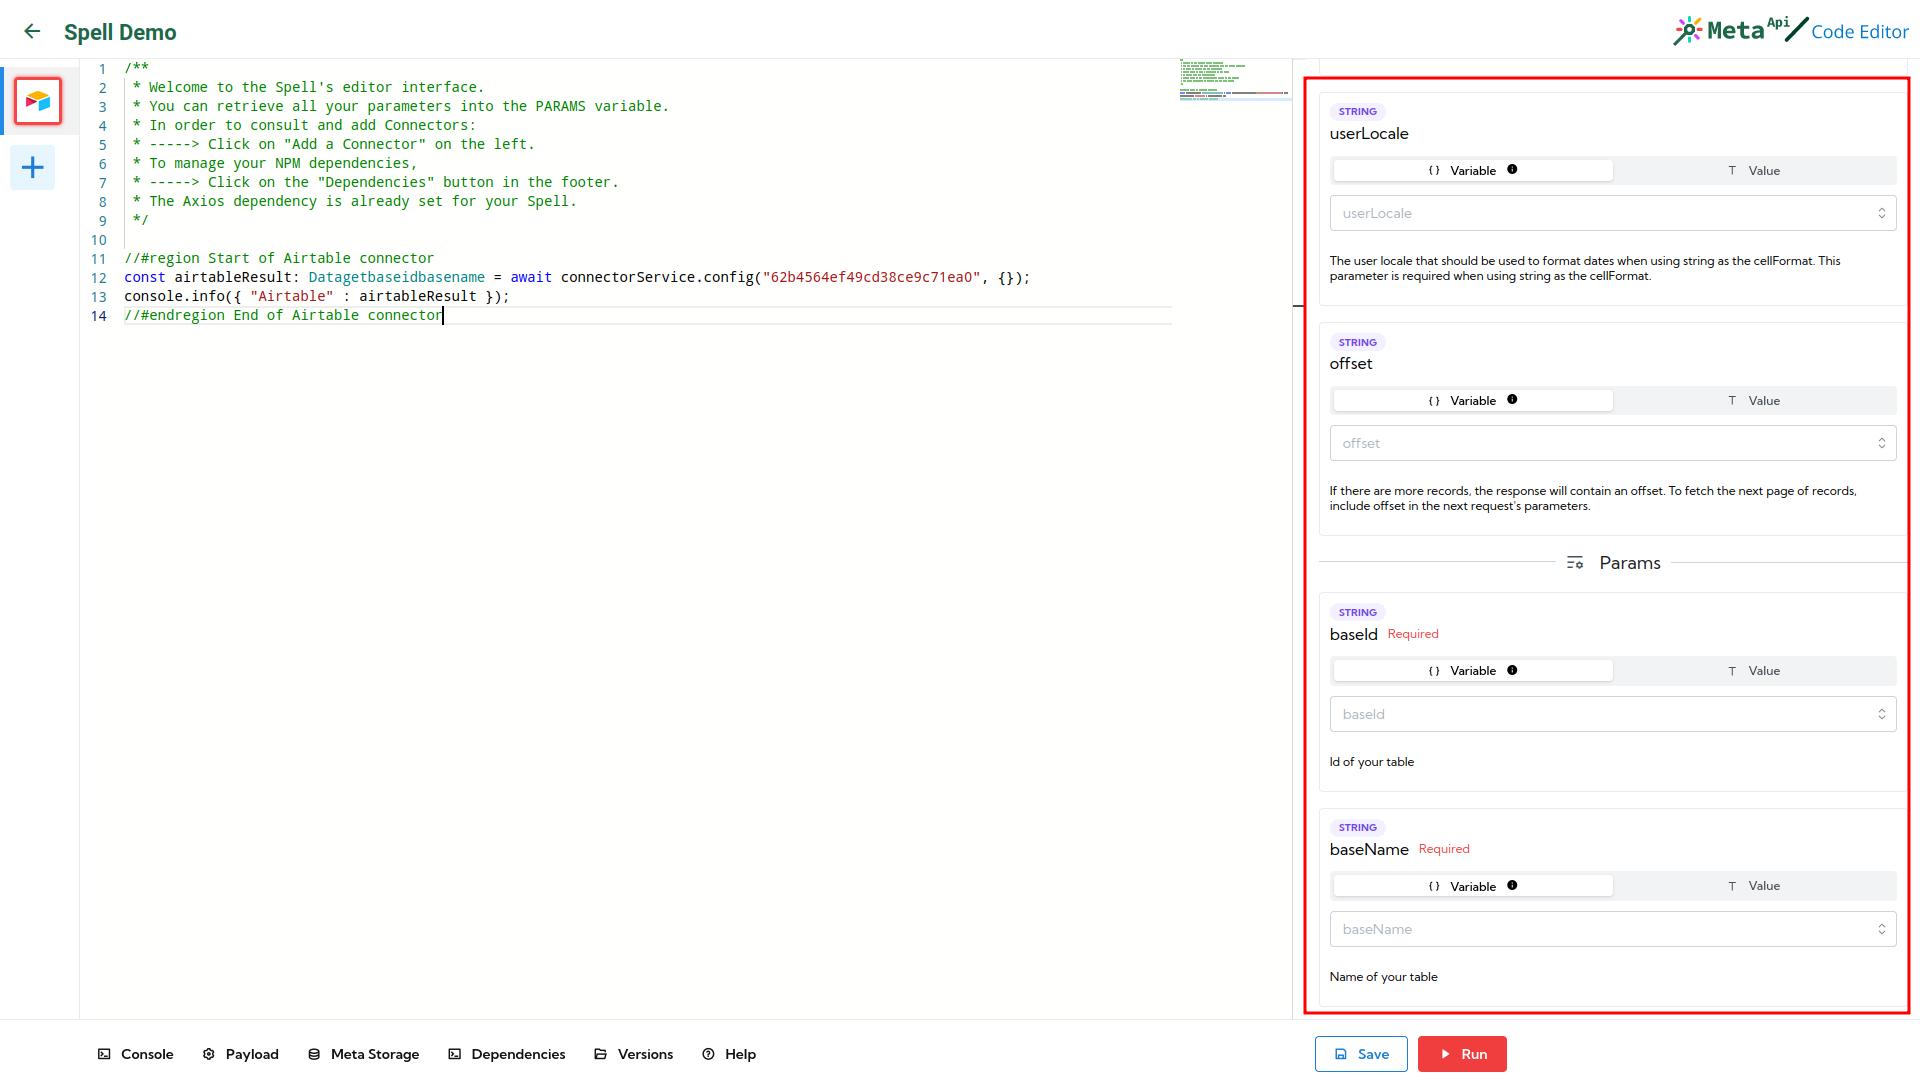
To configure connector's parameters, select a connector inside the left menu.
Inside the panel on the right, you'll see all the parameters available inside this connector:
Before configuring a connector, you should authenticate first (click here and follow those steps to know how).
We also provide a solution to faking (and mocking) requests, check it out here!
You can set any value you want inside each input, and you'll find precision about the type of each parameter and a description (if configured).
Some parameters are required, others optional. You can run your Spell even if you didn't fill required parameters, but you should expect some errors...
Working with a body
When you are working with POST requests for example, you'll have to send a body.
A body is configured directly inside your code editor, like this:
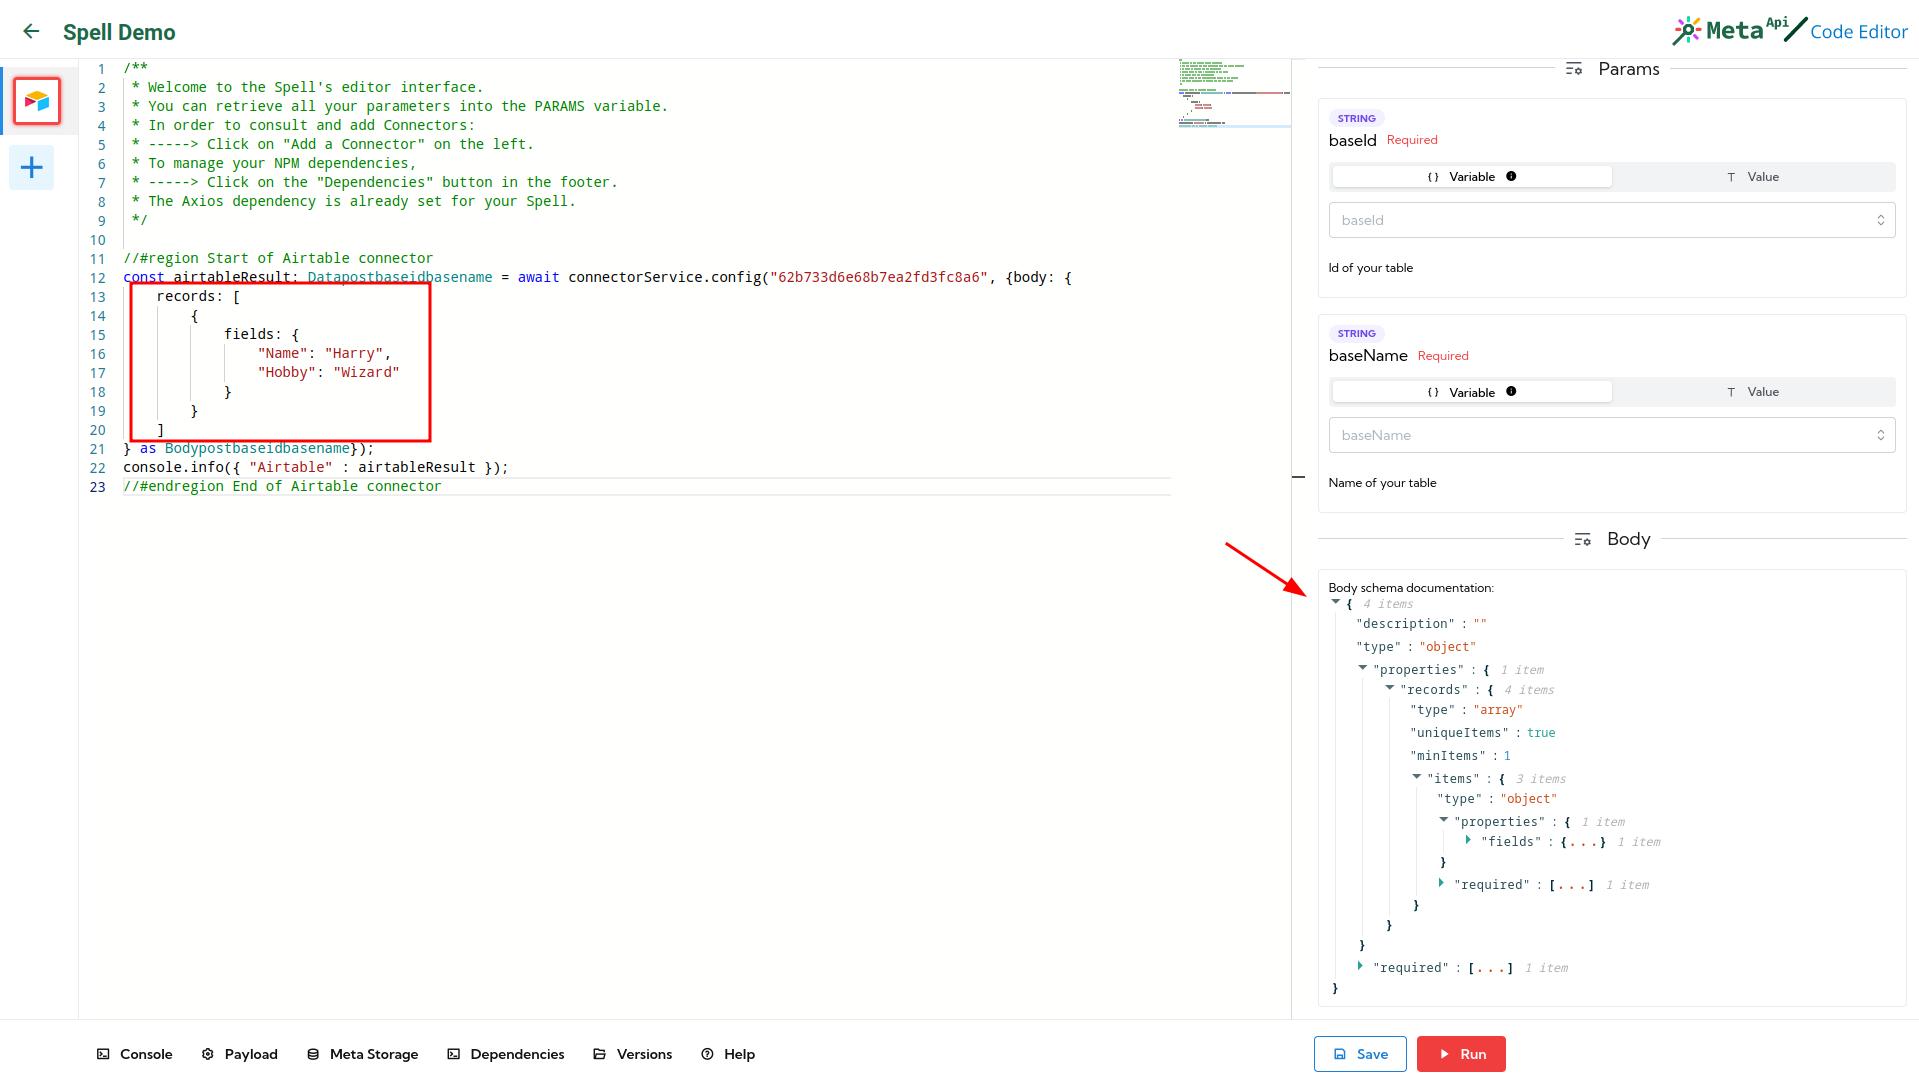
The body is set up directly inside the connector's code, and you'll have (if available) code autocompletion when you'll write this body.
The body's schema can be found the right panel when the connector is selected.
If you want to disable type checking for the body, replace as Body... at the end of the code snippet by as any.
Example with the screenshot: you'll have to replace as Bodypostbaseidbasename by as any.
Add another connector on Spell
Open connector Manager
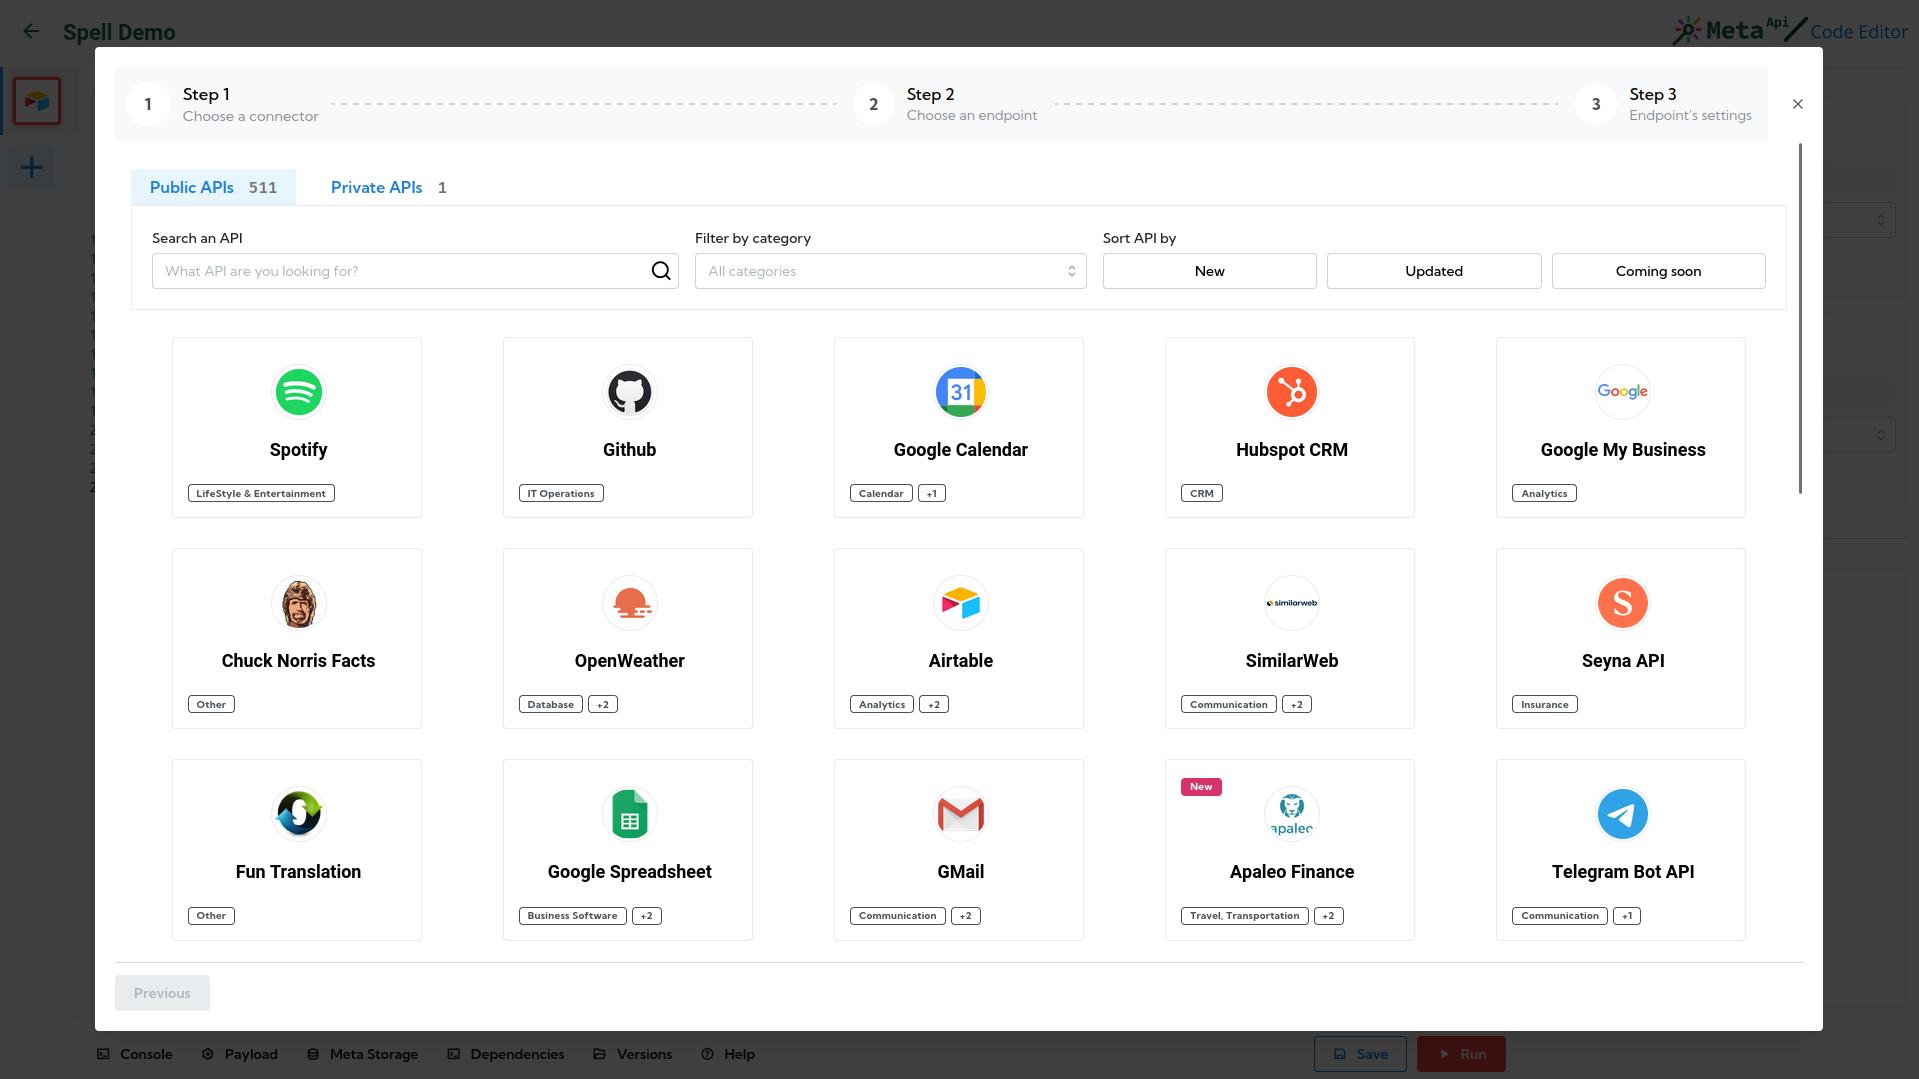
To add another connector inside your Spell, click on the + Add a connector button inside the left menu.
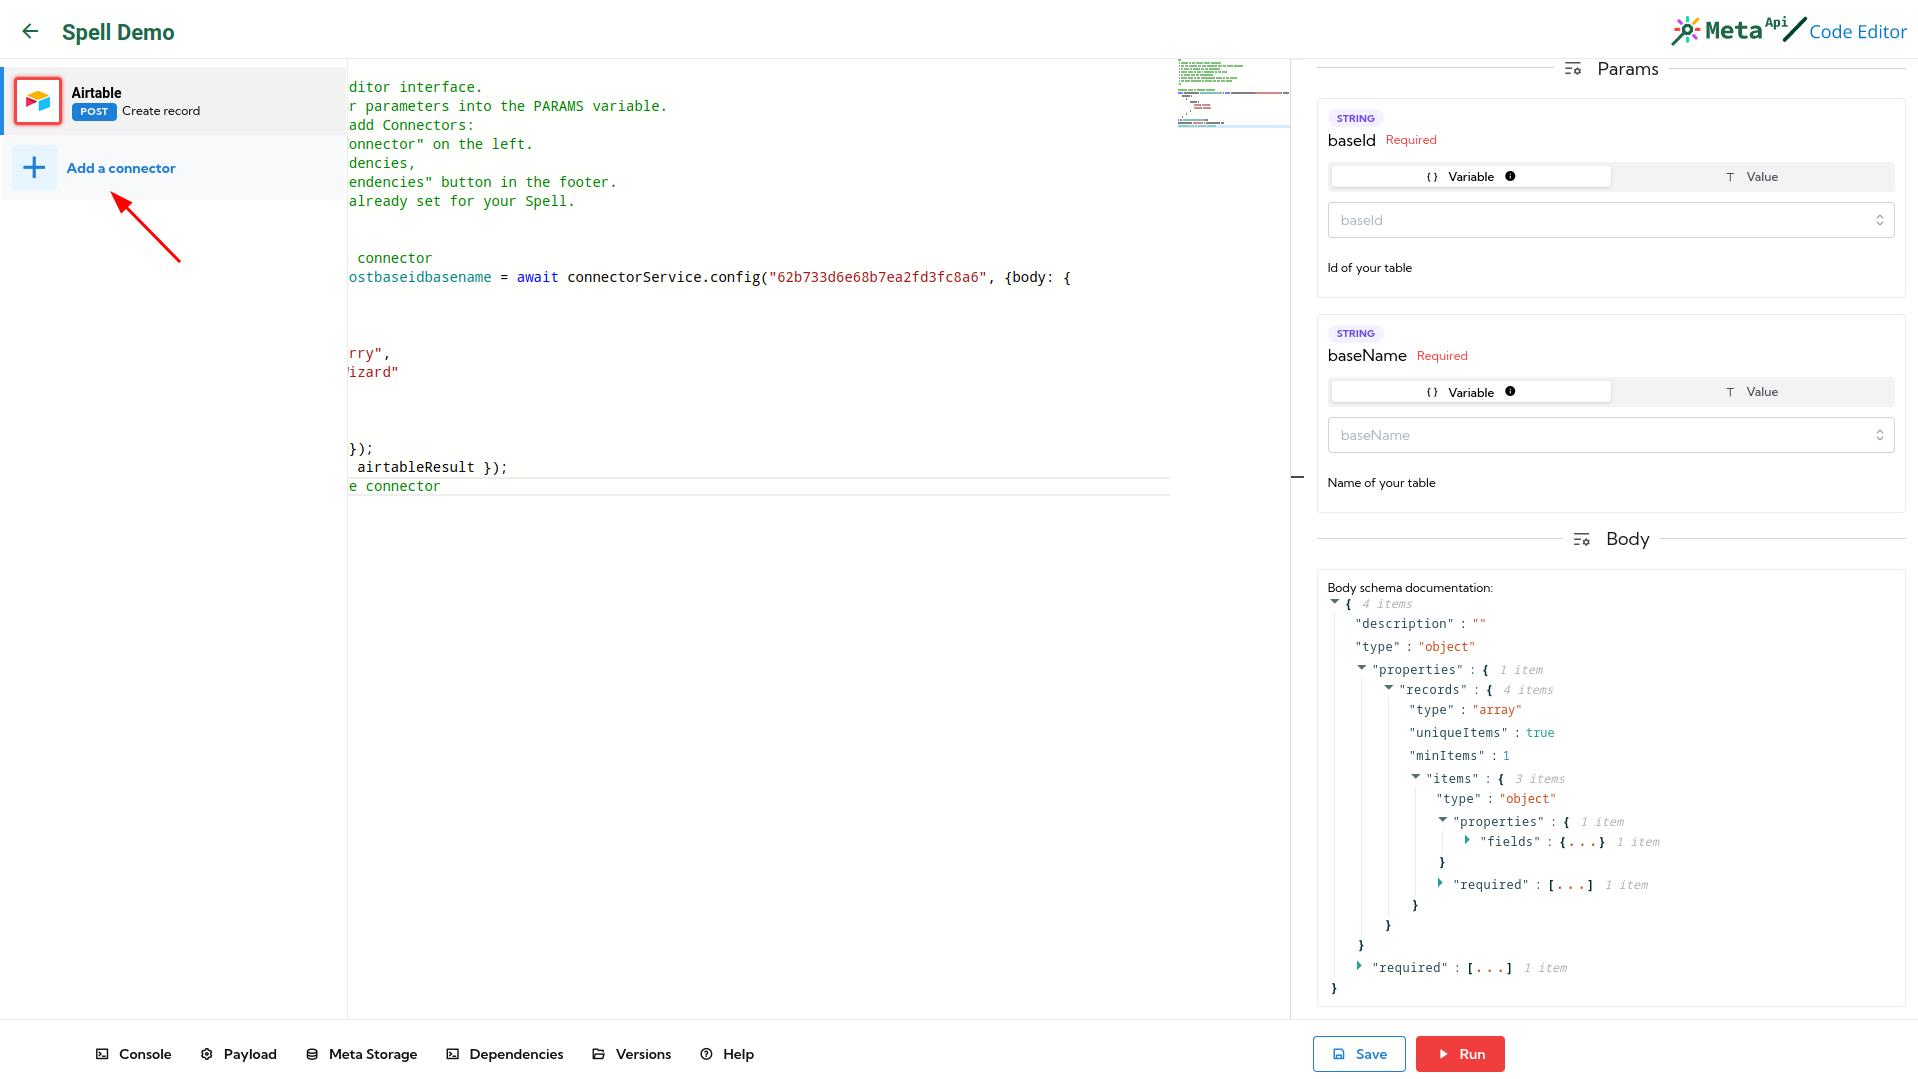
A popup will appear to let you choose an API and an endpoint.
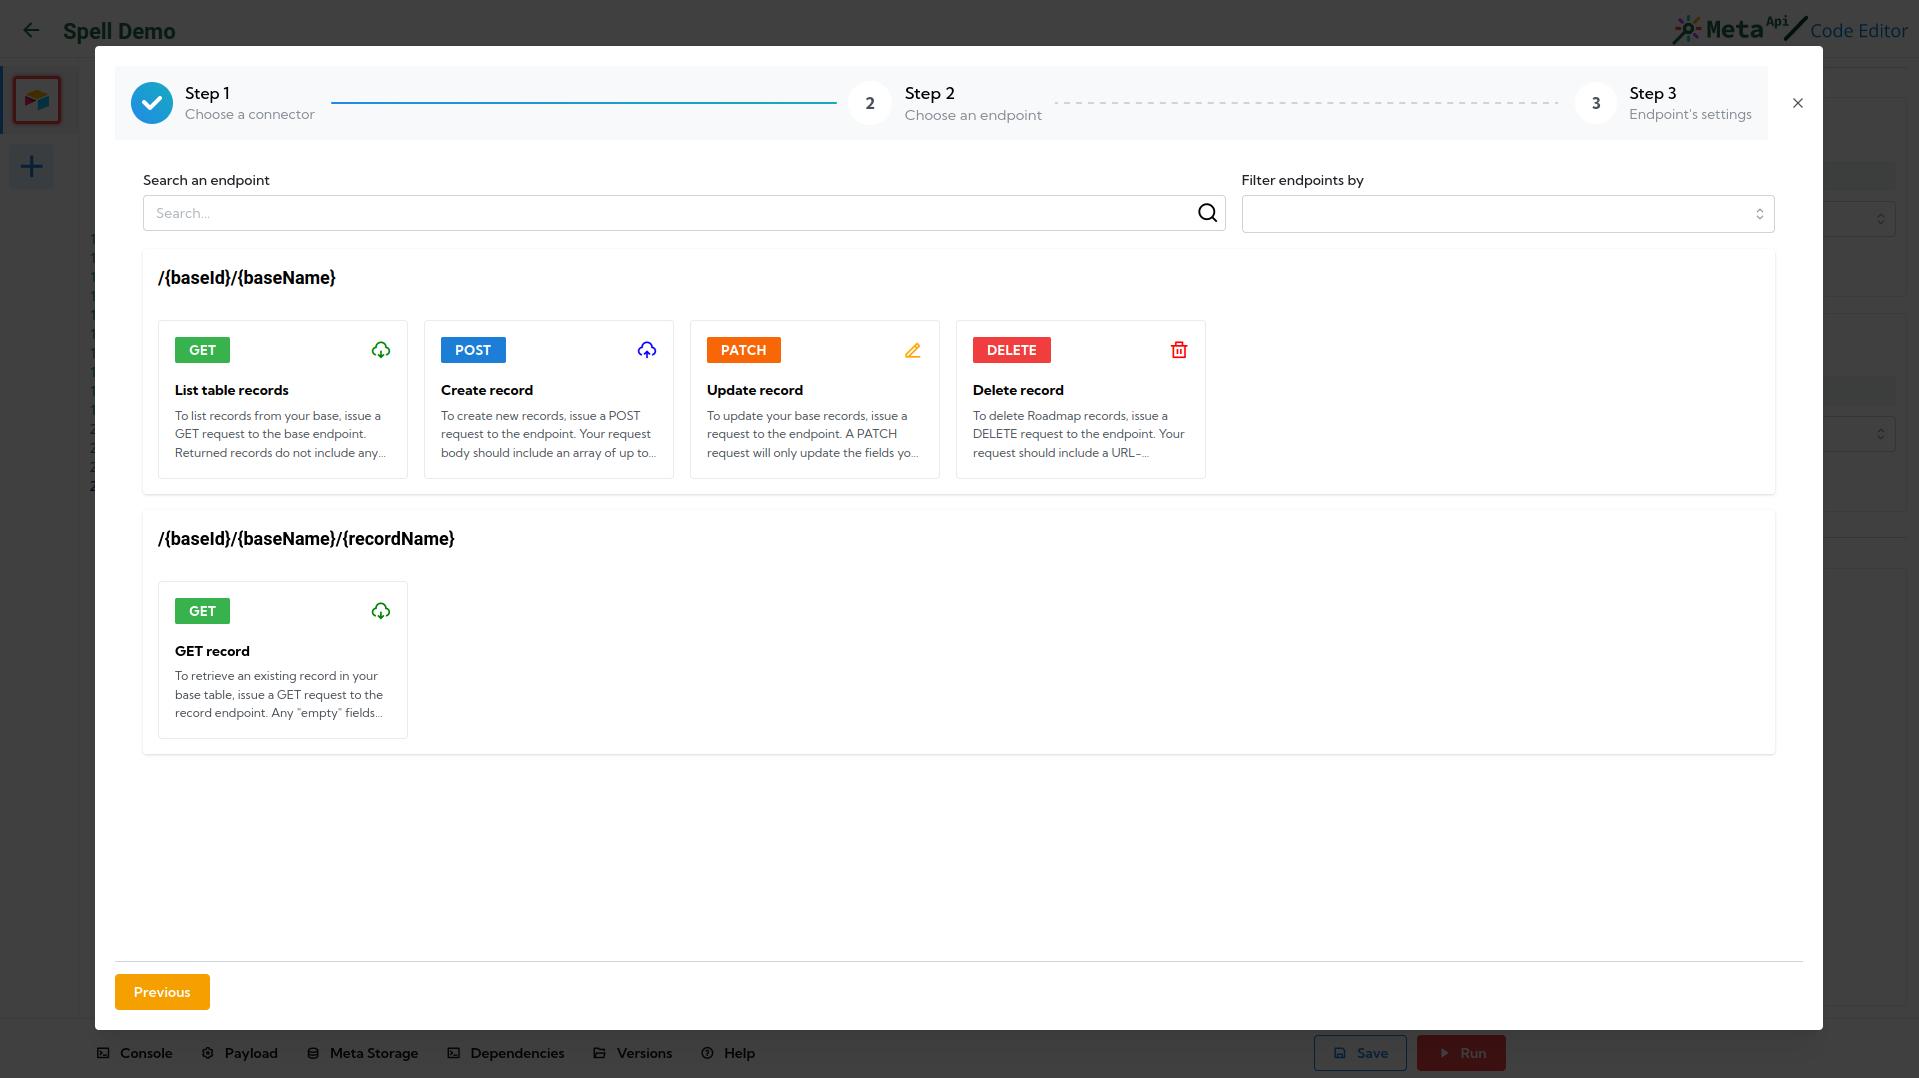
You'll see all endpoint details. Click on the Add xxx button to add this connector to your Spell.
Copy code's connector to the editor
To use a connector and configure it, you must add its code inside your Spell. A message, in the detail panel, will indicate you to copy and paste the connector's code where you want inside your Spell. Click on the Copy the code button and paste it inside your code.
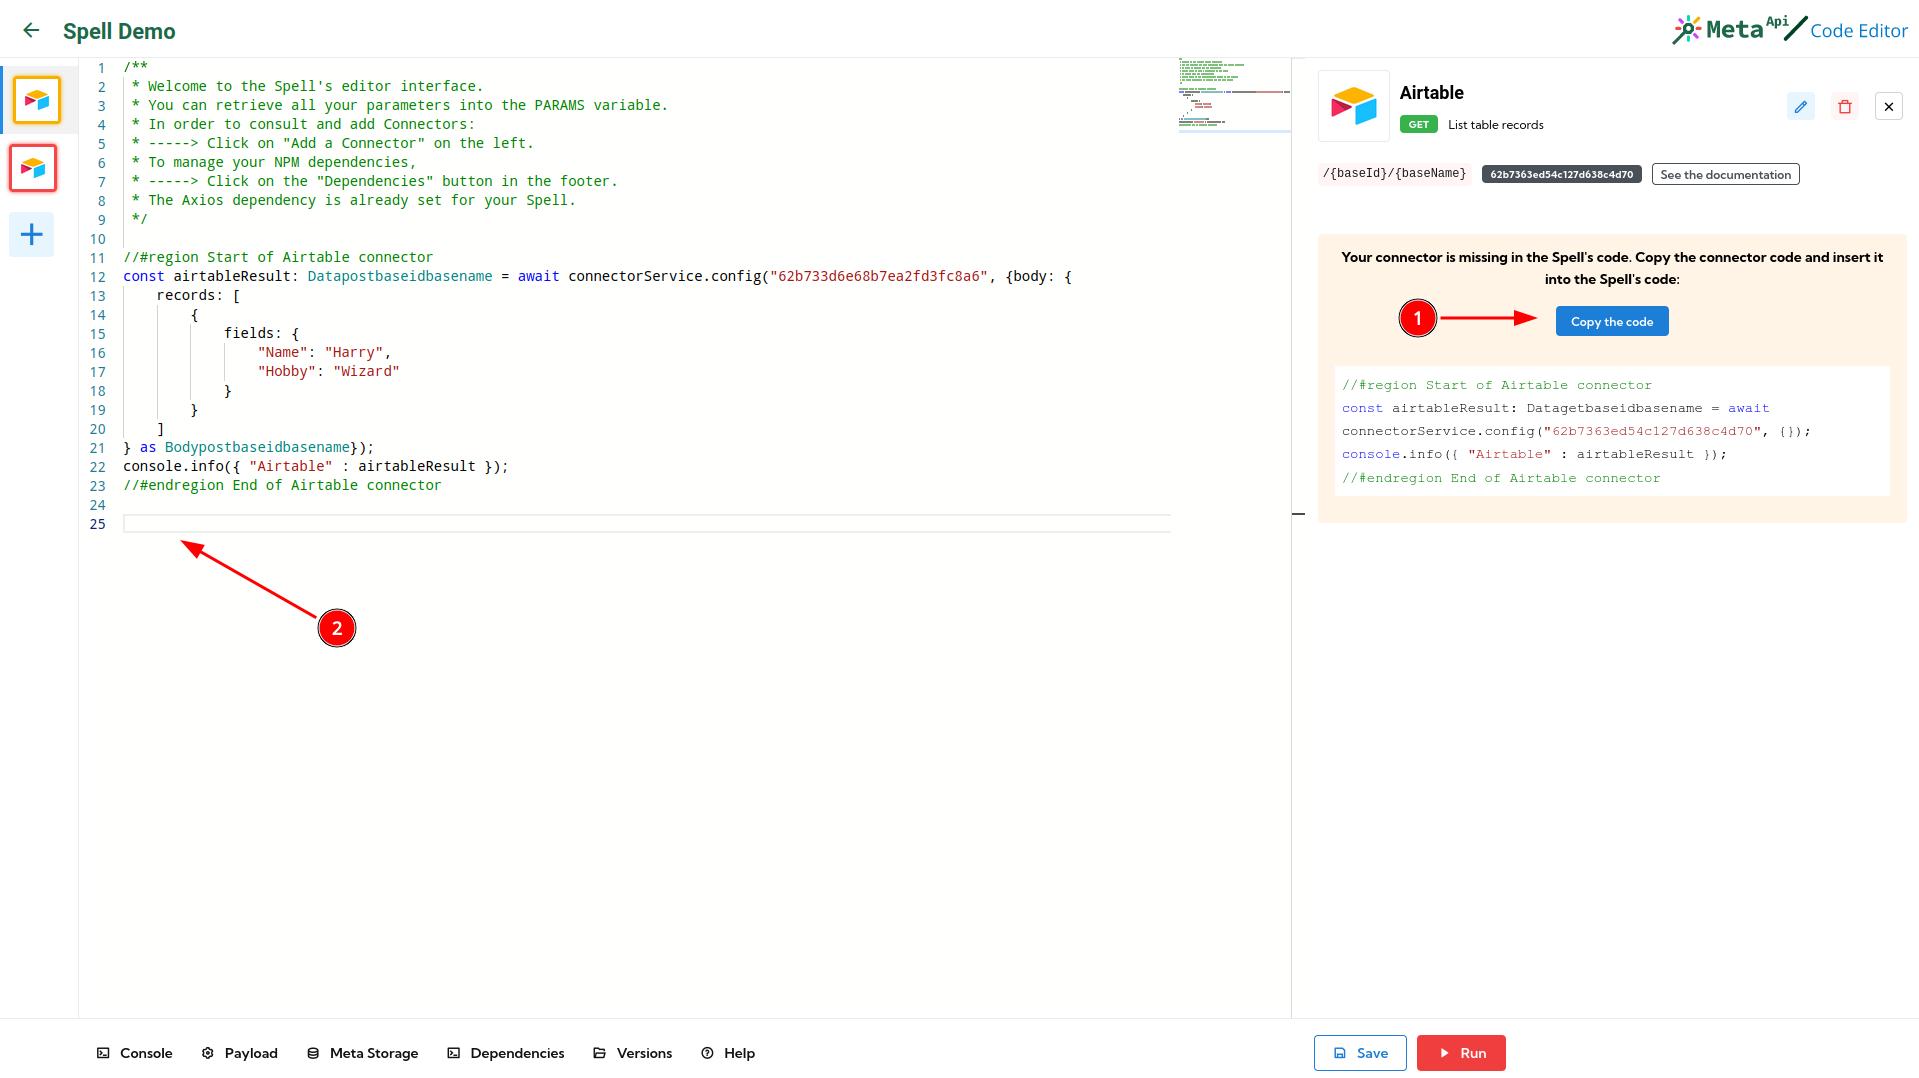
The message will disappear, and now you can configure your connector:
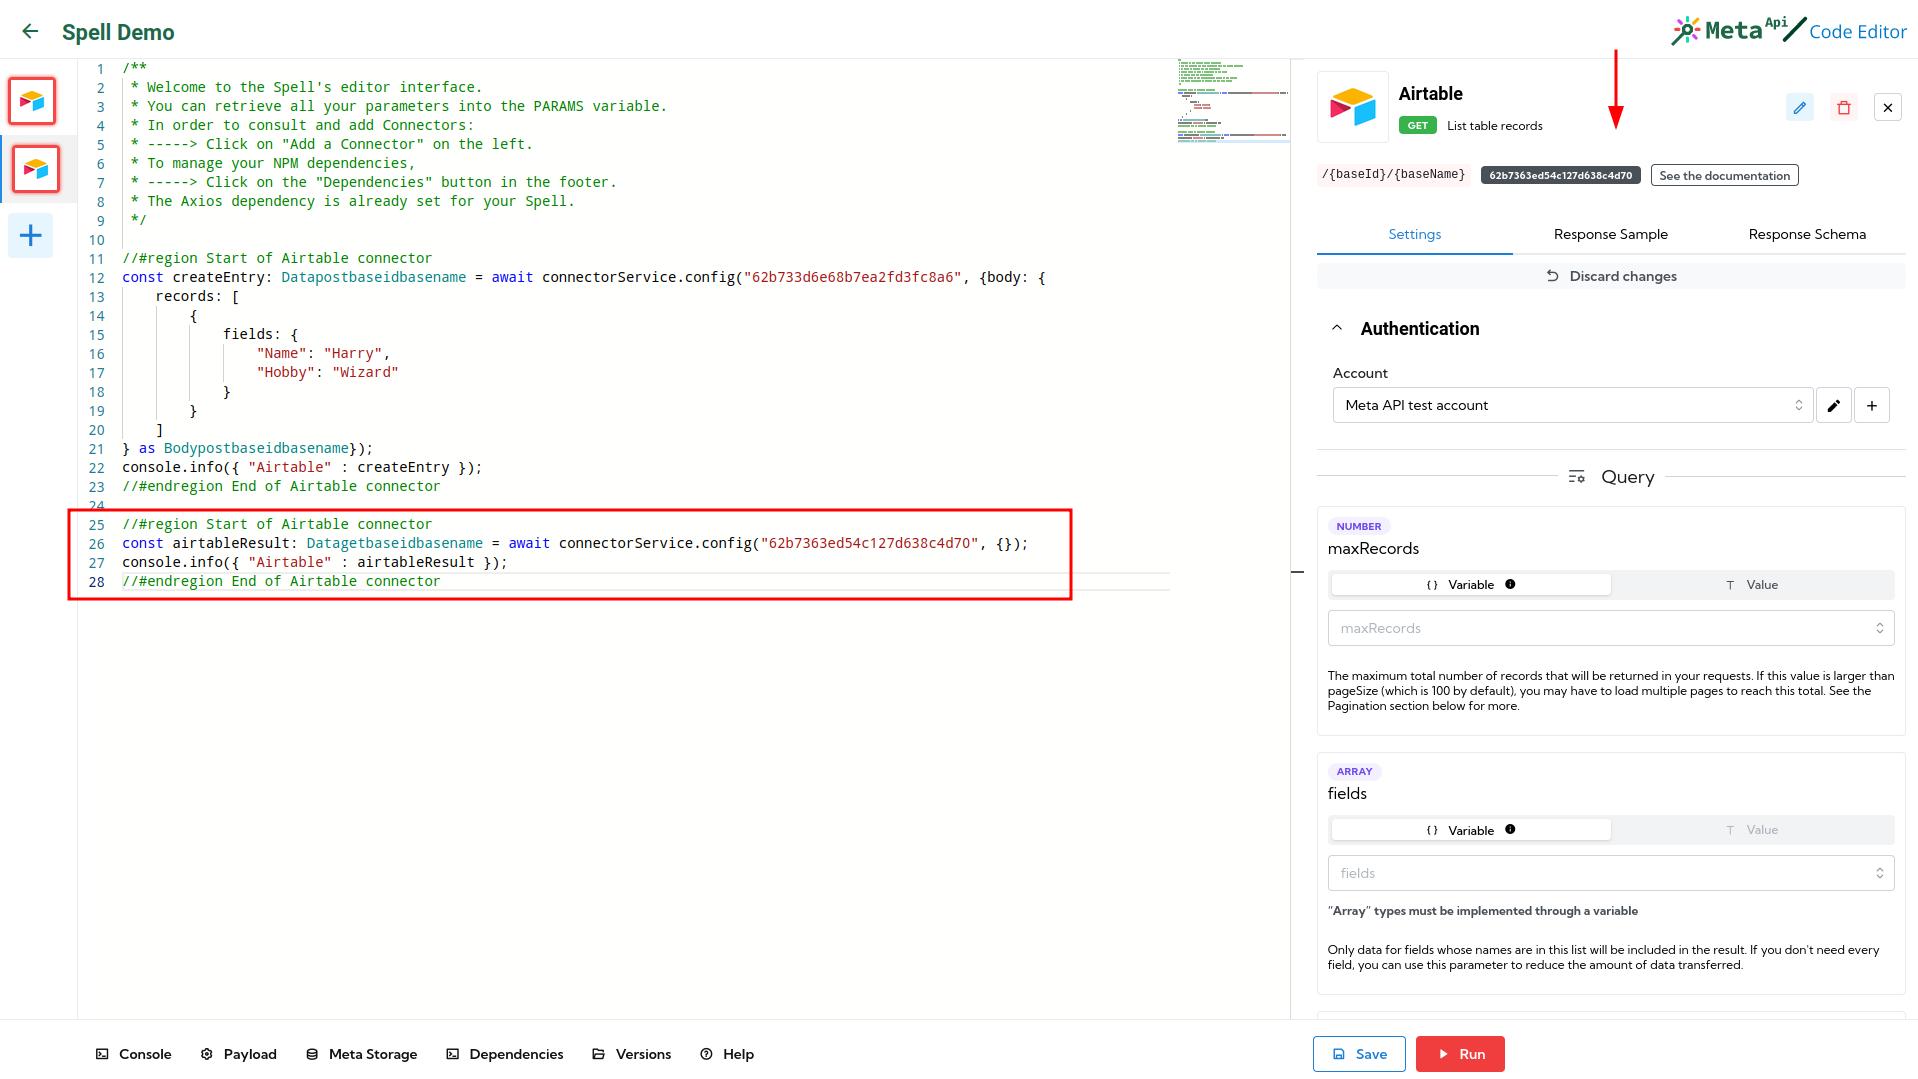
If you are using multiple endpoint on the same APIs, many variables will have the same name. You can safely rename them.
Example: this standard Airtable code snippet
//#region Start of Airtable connector
const airtableResult: Datagetbaseidbasename = await connectorService.config(
  "62b7363ed54c127d638c4d70",
  {}
);
console.info({ Airtable: airtableResult });
//#endregion End of Airtable connector
can be renamed:
//#region Start of Airtable connector
const myUsers: Datagetbaseidbasename = await connectorService.config(
  "62b7363ed54c127d638c4d70",
  {}
);
console.info({ Airtable: myUsers });
//#endregion End of Airtable connector
Working with test values and mocking requests
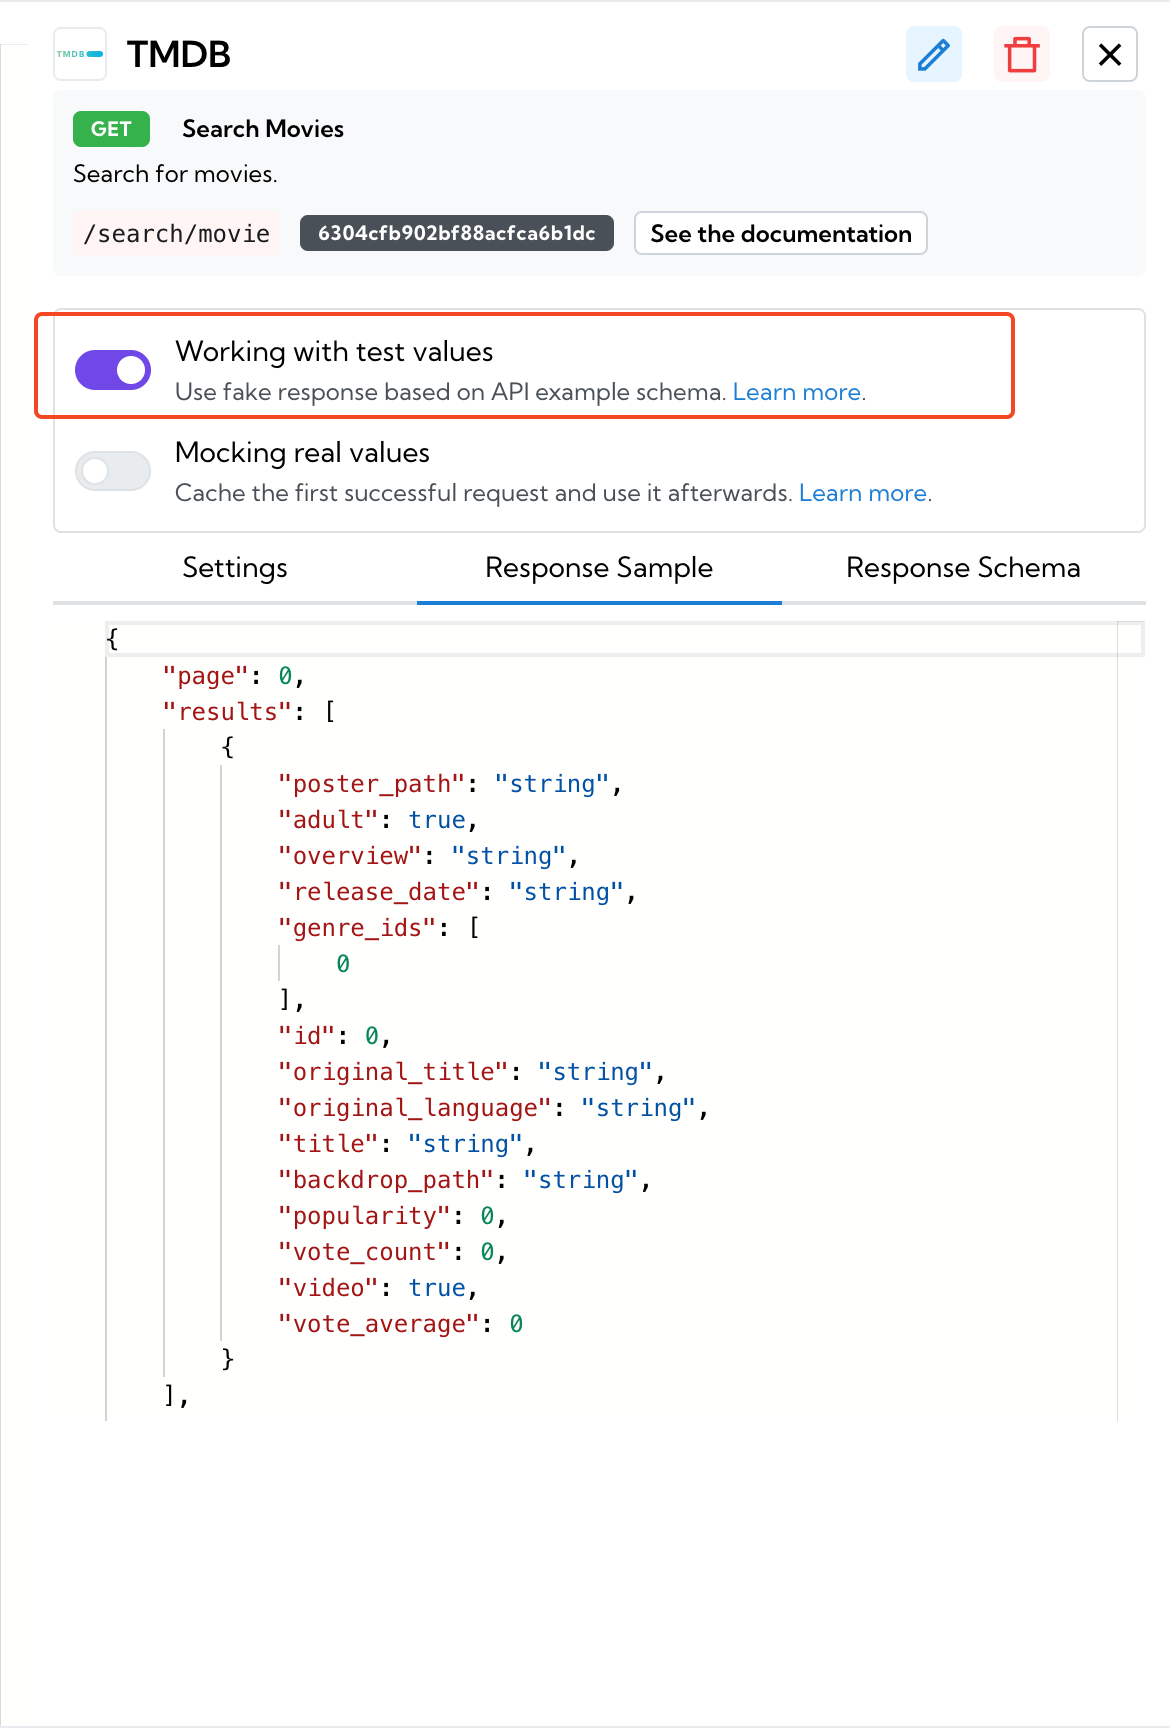
Fake requests (test values)
If you don't have an authentication or just want to test a connector without to create the authentication, you have the possibility to faking connector's request.
When available, the connector will return a fake response based on its example or schema. You'll be able to work with these data like real ones and authenticate later.
This allows to build spell logic quickly without worrying about connector's configuration.
To enable fake requests, activate it on the connector's panel detail at the top:
When pushing in production, fake requests functionality will be inactive. Be sure to authenticate before pushing your Spell in production.
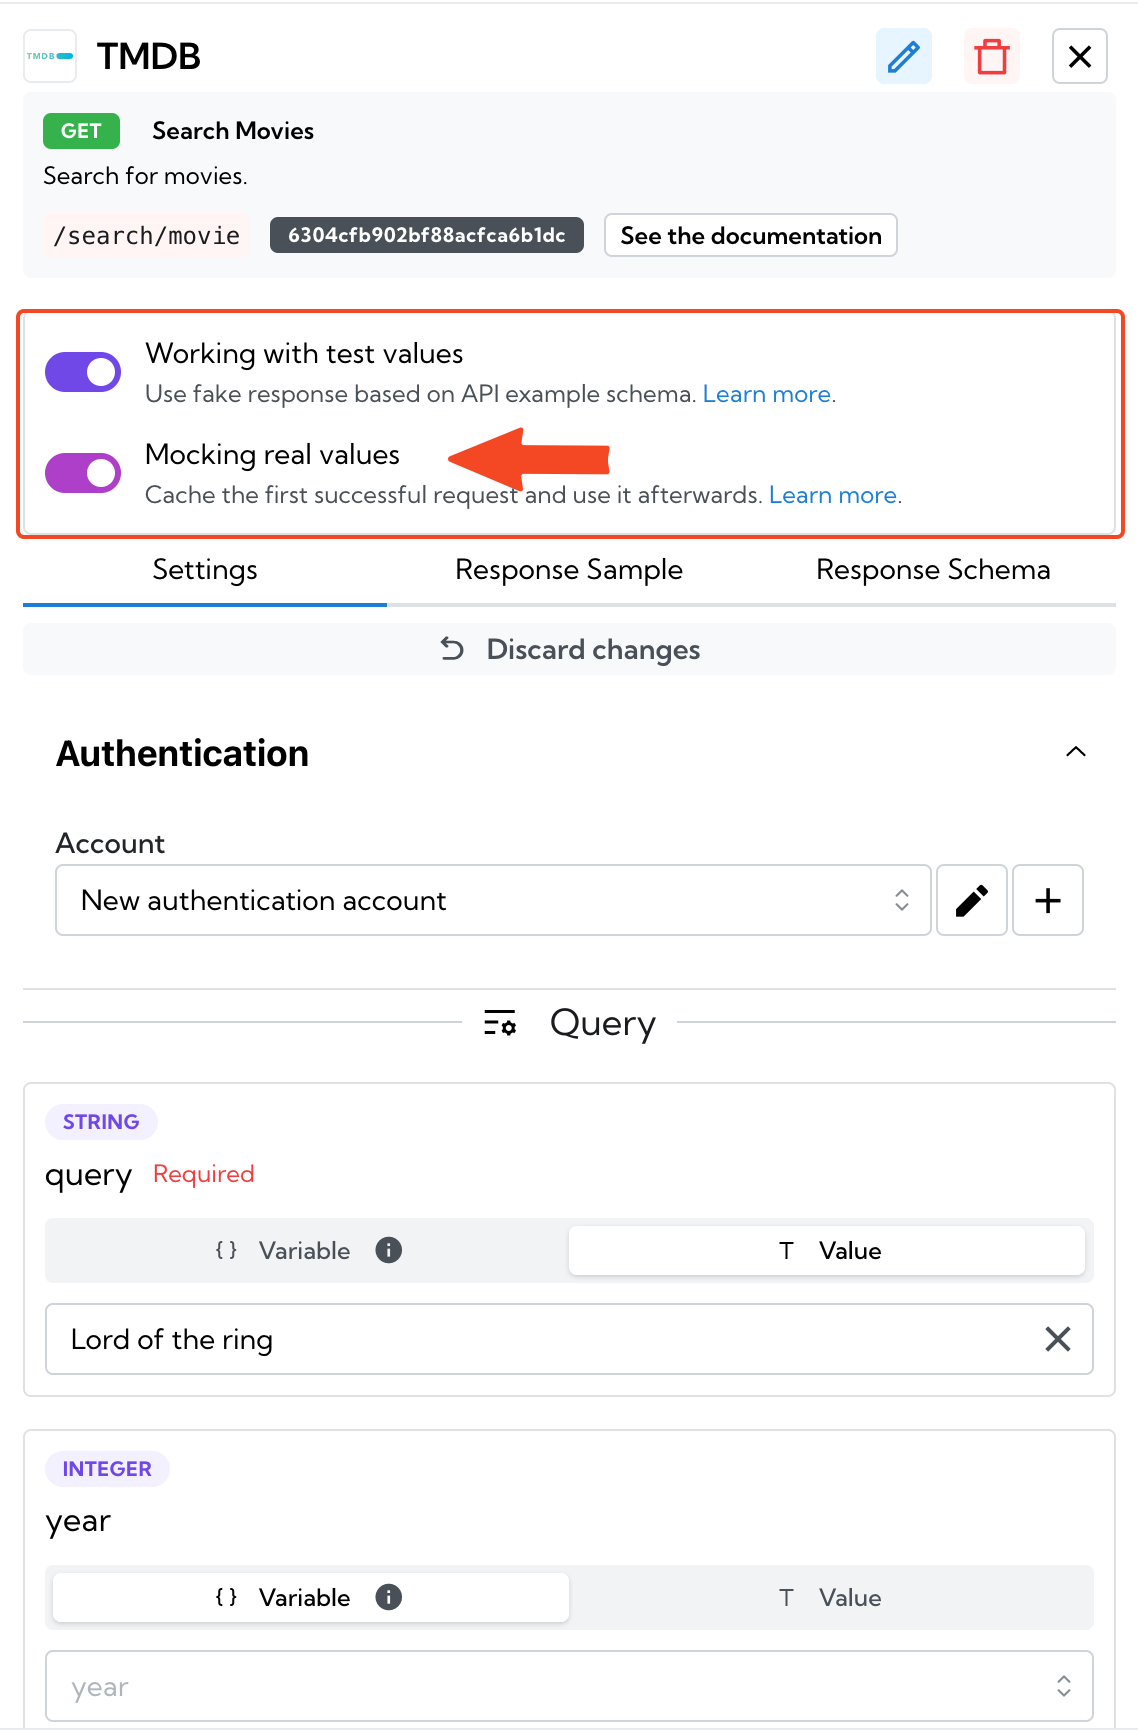
Mock (cache) requests
When developing a Spell, you have the possibility to store real value and use this result during your development period, saving you the extra cost of some APIs.
By activating the mock request functionality, it will cache the next successful request and use it afterwards.
In order to work, you must set all required parameters of the connector and have a valid authentication.
To work with mock requests, activate it on the connector's panel detail at the top (Working with test value must be enabled):
When pushing in production, mock requests functionality will be inactive making real request each time.
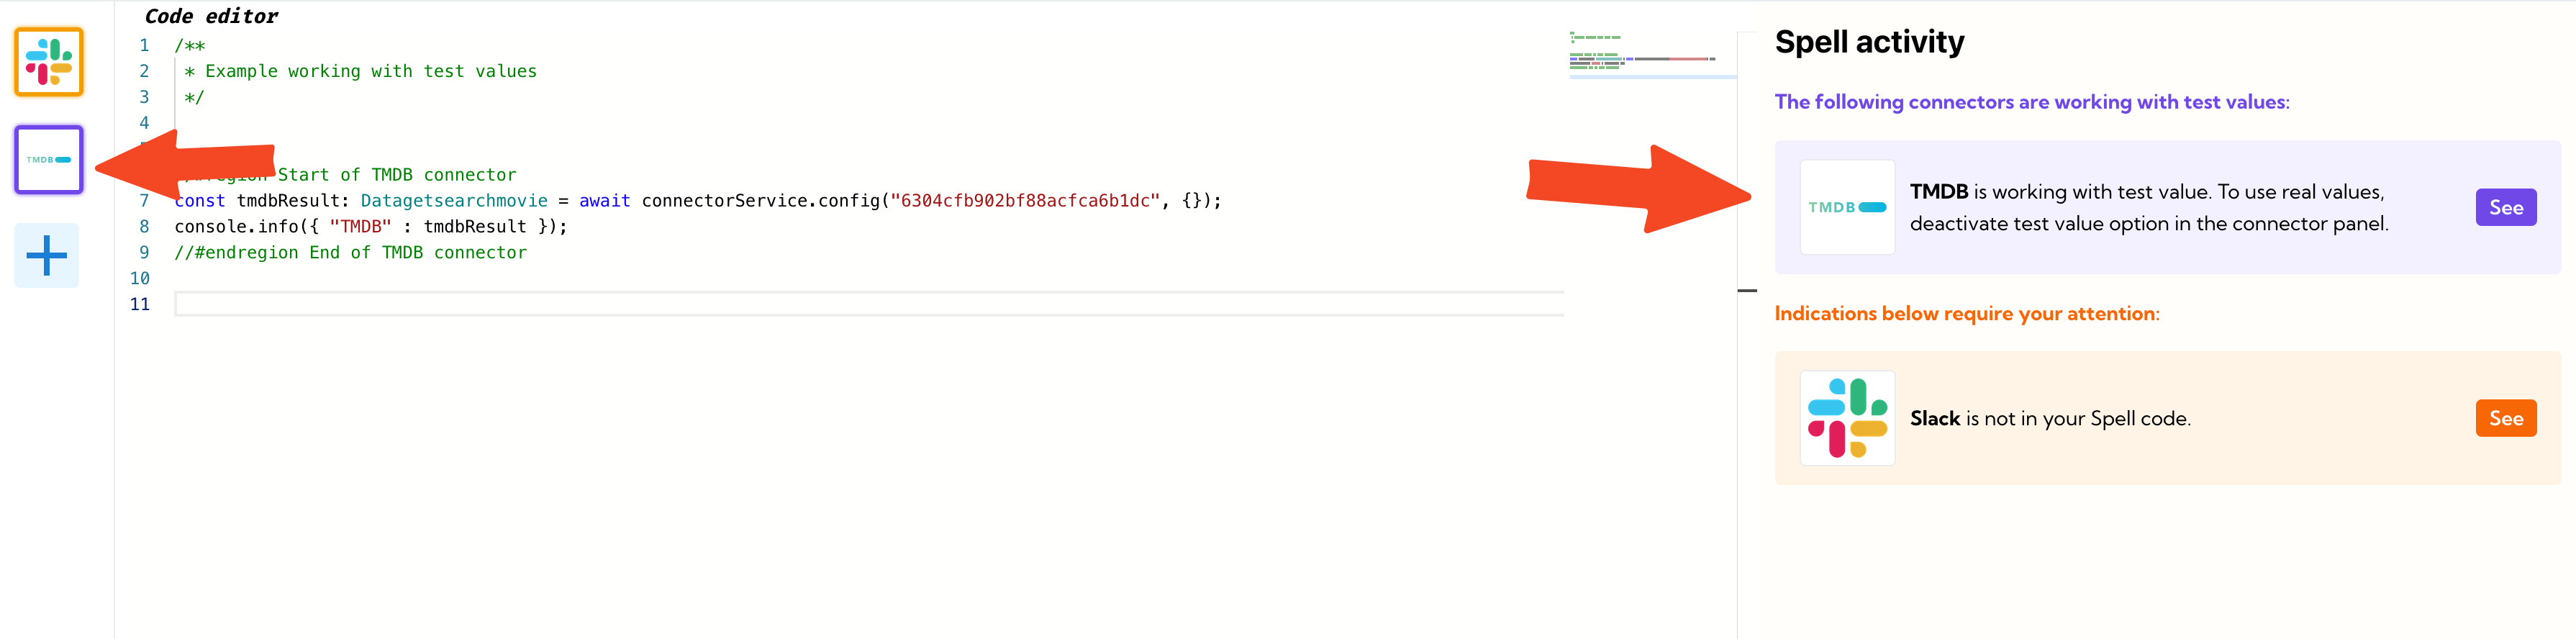
Test values' indicator
You can know at a glance which connector is working with test value. They're represented by a violet glow on the list and by a card in the Activity panel: