Customize OAuth authentication
You can set up your own OAuth account for any supported APIs. That will give you control over your usage, permissions asked and add your own branding.
You'll need to create and configure a new OAuth app inside your provider website or developer center.
When you open the OAuth configuration popup, you'll see this popup:
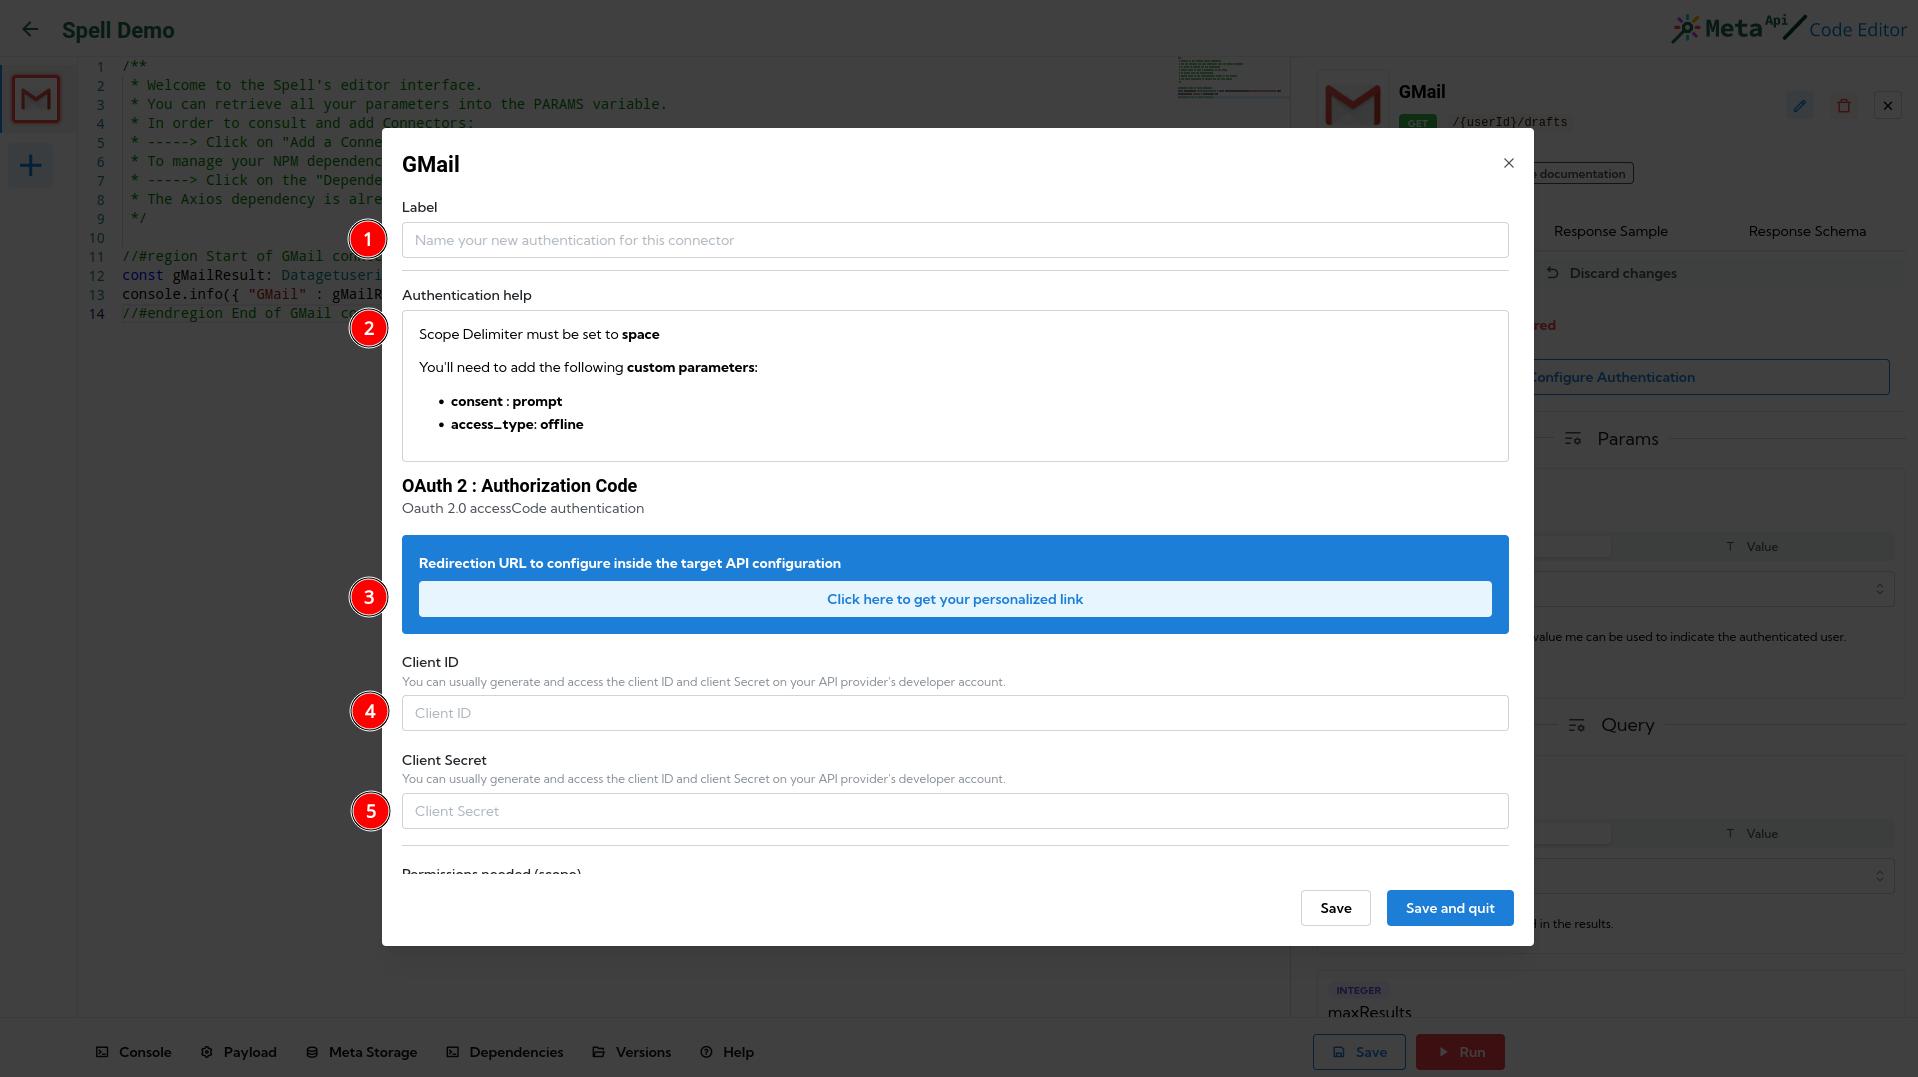
- Add a label to your authentication account to quickly find it later
- We provide some help on how to configure OAuth on some APIs
- Click on the Get your callback URL to retrieve your own URL you'll have to provide when creating your OAuth app
- Paste here your generated Client ID
- Paste here your generated Client Secret
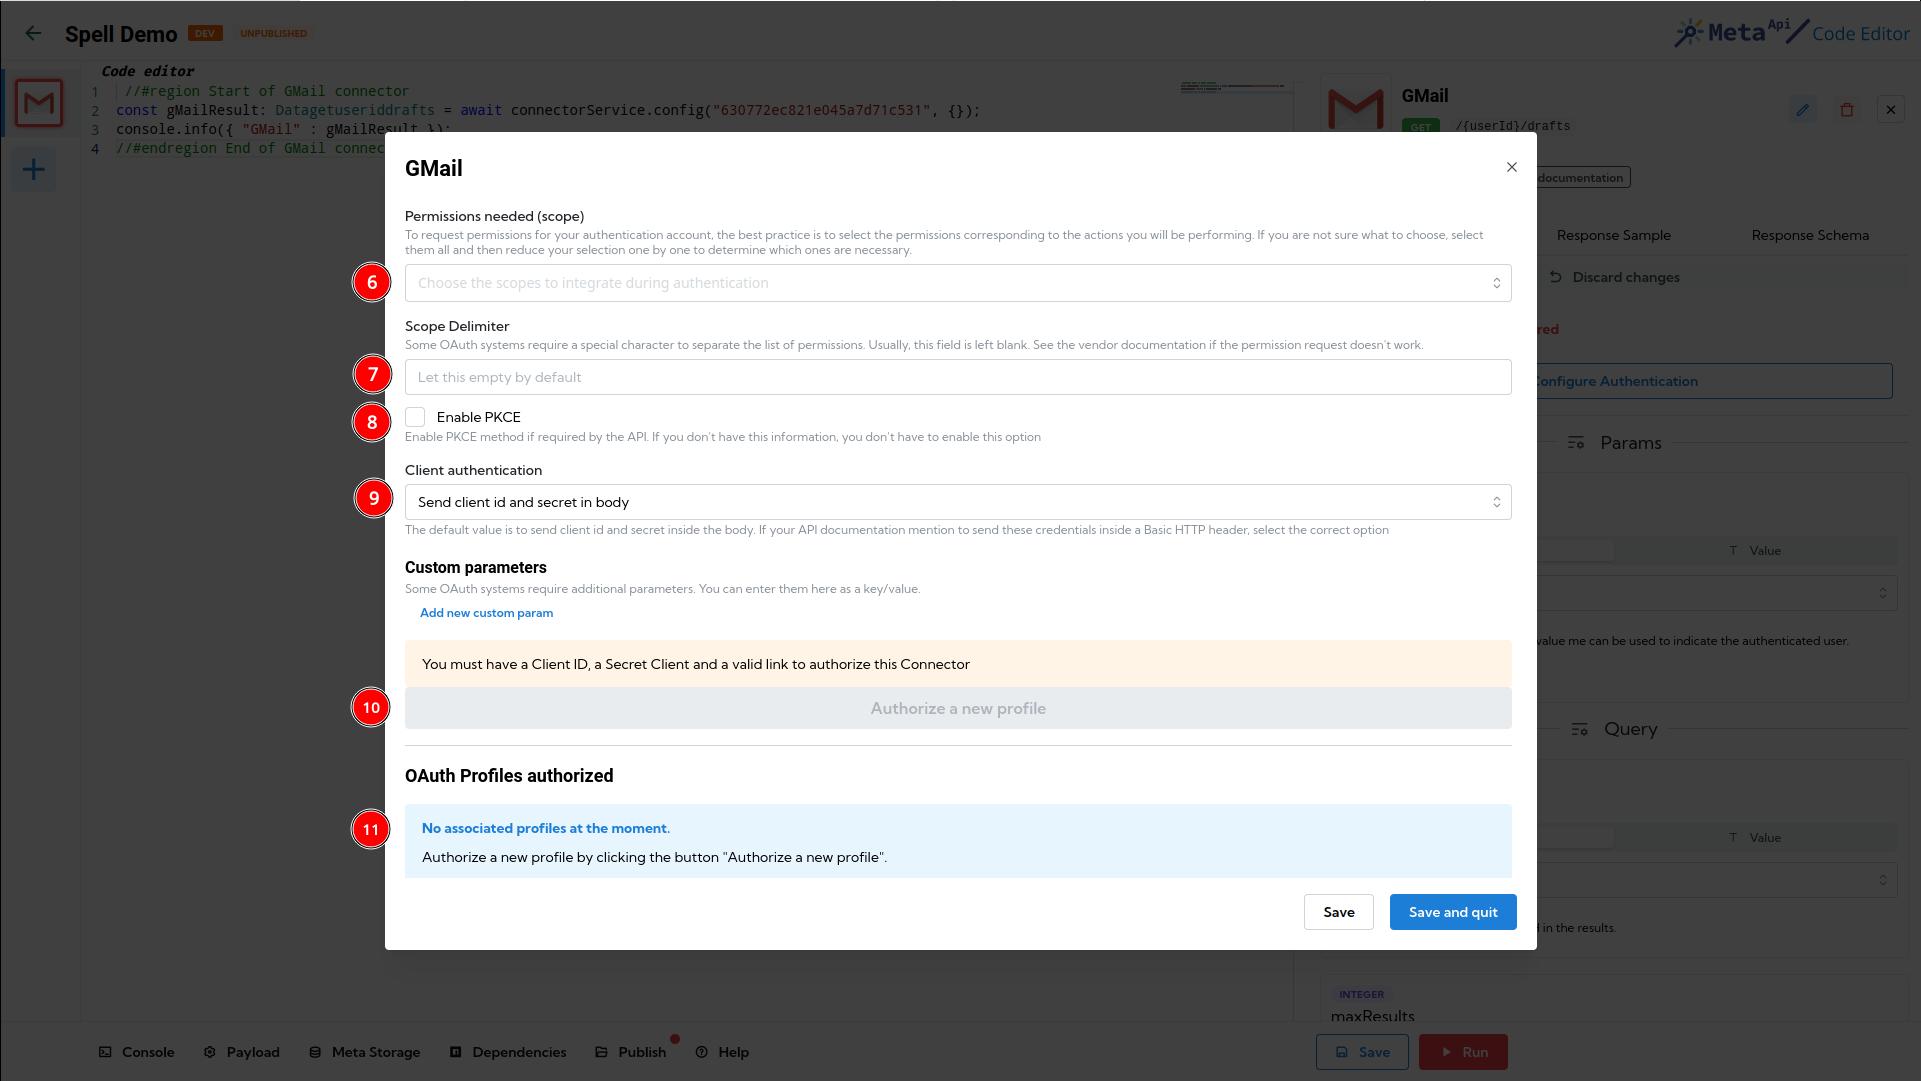
- Select all the scopes you'll ask yourself or your end users. That'll define the level of permissions on each OAuth popups. For many APIs, you need to select an offline scope in order to retrieve an OAuth token.
- Some APIs need a scope delimiter, like a comma
,or an empty space⠀. - PKCE is an advanced security option. Enable it only if the API provider ask you to.
- You can customize the way the authentication will be done. By default, the Client Id and Client Secret are send inside the body, but for some APIs, they need to be sent using an HTTP Header (Authorization). Use the second option here to use it.
- Some OAuth configuration need advanced parameters. You can define them here.
- Once your configuration is done, this button will be accessible and you'll be able to authentication your own account
- All authenticated accounts will be list here